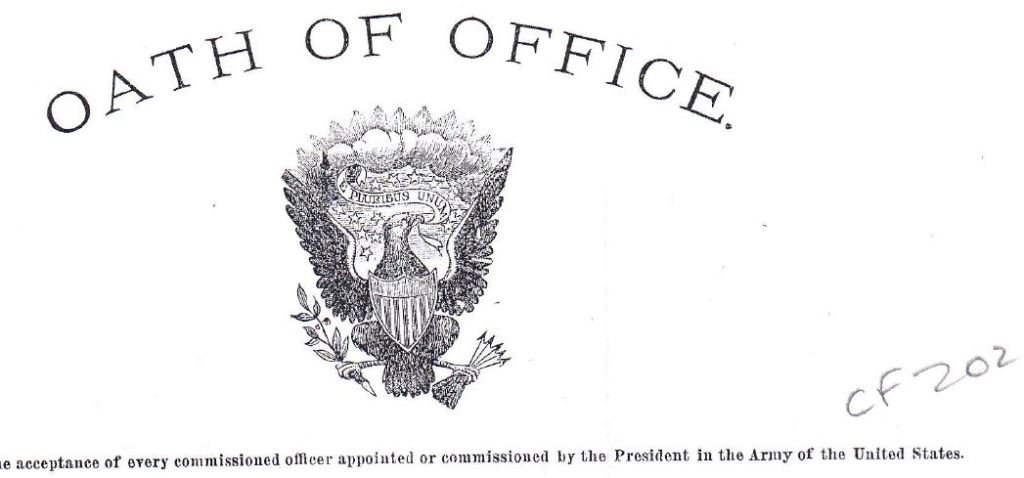
The doorbell rings, the dog barks and the UPS driver escapes up the driveway toward his next delivery. At your doorstep…two boxes. The return address tells you they are from the National Archives. You’ve been waiting for this day. You calm the dog and open the first box, then the second. Inside…437 pages of a man’s life. This is a Consolidated Military file from Record Group 94. You carefully thumb through the stacks…everything looks like new and exciting information. Even documents in the ancestor’s handwriting you’ve come to know so well. What do you do next?
Document management is a big deal. Putting in the time and following certain logical steps up front will save you time, money, and headaches later down the road. I’m drawing from my years of experience as a financial crimes investigator. We had paper, boxes, and boxes of it. Even truckloads in one case. Document management is enormous. The good news is, it can be easy… slow down and follow some basic best practices.
Okay, so you have this big stack of documents. It doesn’t matter where the paper came from or what order (or disorder) it is in. Relax. As a family researcher, you want to jump into and go through this stack. Or, you might be on the other side thinking, “What should I do?” Again, Relax. Follow these steps:
Step 1. Preserve Original Order. Before doing anything else, consider the state in which you found or received these documents. There is an order to them, even if they are just thrown into a box. One document is on top, others below it, and one is last. Step back and look. Think of this as a crime scene. You don’t know what happened; you just know what you see.
In most cases, the documents will have some order, which we want to preserve. It could be important later. Do not place the documents in any order before going to the next step. Whatever you do, you need to be able to put these documents back into the original order to recreate the ‘crime scene.’ We do this by using a numbering system.
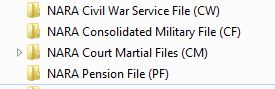
Step 2. Numbering. We must assign a number to each page, starting with the first or top document. Even blank documents and documents that don’t look important. A simple 1, 2, 3, etc., is okay but not great. Just a number on the corner of a document doesn’t tell me much. 1 of 437, 2 of 437, 3 of 437 tells me more. I now know that page 67 came from the stack of documents that numbered 437 in total. But we can do better than that. We want to say this was the 67th document from the Consolidated Military File. You may have also acquired a Pension File, the Civil War File, or the box of genealogical materials from your late Aunt Mary. A better way to number documents is with an identifier that identifies the documents. For the Consolidated Military File, I used “CF”. CF001, CF002, CF003 etc. The Pension File’s documents are numbered using “PF.” PF001, PF002, PF003 etc. Civil War…”CW”. So now, we can tell the difference between the 67th page of the Consolidated Military File and the 67th page of the Civil War file. Believe me, they will look a lot alike! No guessing about this matter. We know what we have because we took the time to number the original order(s). Now, put those numbers on the face of the document. I know you might not like this idea, but it ties into the following steps. I have used little pre-printed stickers and just wrote the numbers by hand. Both are fine.
Step 3. Scanning. Yes, scanning. Paper is good, but you only have one of each. Things happen, and papers get lost. Scanning the documents allows you to sort and share them in various files. And there is a backup. Frankly, I don’t care much about what happens to the original documents after they are scanned. I keep them in a big file box with all the other stacks of paper I’ve scanned. So now there is a fork in the road on how best to scan these documents. You could pick out only particular documents and scan those or scan the whole darn stack. If you pick and choose, you run the risk of not making a copy (scan) of something found to be important later. It can also mess with the computer-generated numbering, which we will discuss below. The magic starts if you scan everything in the order you numbered them. I promise! Scanning 437 pages wasn’t fun. I did it over several sittings. Oh, did I add that each page needs to be individually scanned? Yes, one by one. You’ll see why later. Scan each document in the correct orientation, with the number you applied visible in the scan. Scan them in order…this is very important. Lastly, file them in a folder containing just the documents from that stack. The pension file is in one folder, and the civil war file is in another.

Step 4. Naming Scanned Documents. Okay, you numbered everything and scanned the individual paper pages in order, and they are all in the same folder with only documents from that stack. Now, the fun begins, and your hard work pays off. I want you to select all files in that folder (Ctrl-A), right-click, and then select Rename. Click on the first document in the list.
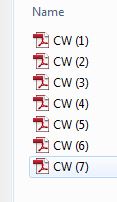
Next, rename all files using the letter code you gave to this stack of documents. “CW,” “PF,” “CF,” etc. Okay! What just happened? Your computer can not have two or more files with the same name in the same folder. There is no way to have a file named “CW” in the same folder as another file named “CW.” The computer assigned a suffix number to the list of documents you just renamed.

So if this is done correctly, meaning you scanned the documents in order and renamed all the documents simultaneously from the top…magic. CW (1) is the same as scan CW001. Got it?
Step 5. Sorting. “Okay, Mr. wise guy, my documents are still in the same order (or no order) they were when I started this!” I got ya. But they ARE numbered correctly. Typically, any stack of paper you get will have some order. The documents copied by NARA were copied from the first of their stack to the bottom of the stack. How or why were they in that order at NARA? Hard to say. But this is a Consolidated File. As documents came in, they were put into the file. Ole Aunt Mary may have put those documents in that box as she received them. Date order is not important at this point. Being able to reconstruct the ‘crime scene’ is.
So now we get to sort these documents. And you can sort them in any order you want. Maybe you just want a folder with your ancestor’s original signature. Or do you want only the interesting documents for the final work? But, if you’re like me…they need to be in date order. Chronologically! The Consolidated Military File I received from NARA was nowhere near in chronological order. I might have put them in order at the paper stack stage, but then I would have lost the original order. So, let us put these files in order by date.
Start anywhere you want, open one of the documents, and look for its logical date. Once you have the date, close the document. Now, we are going to rename just that one document. But, it needs to be named in a particular fashion. Here’s how.
Let us say you determine the document was dated December 7th, 1941; rename the document “1941.12.7 CW (1)”. We already have the “CW (1)” from the last step. Now we are adding the date. The date must be entered as YEAR.MONTH.DAY. Your computer will sort all files in a given folder in order. We assign dates as file names; thus, the files will be sorted in date order. I see the light over your head coming on now! Look at this. Three dates for three documents. December 7th, 1941, July 9th, 1961, February 12th 1996. Each document has dates, and our documents need to be in order: 1941, 1961, 1996.

I know I’m using silly dates for the Civil War, but this is an example. Look what happened. Even though CW (7) was below CW (1) and CW (4) in the stack of original documents, by renaming the files with dates in this fashion, all the files magically sort themselves out into date order. (Be careful not to write over the Letter Code when renaming with dates.) This process of adding dates to documents is very powerful, as we will see below.
What next? You could stop here. After all the documents are sorted chronologically, reading them reads like a story. It all makes sense. But you can do more.
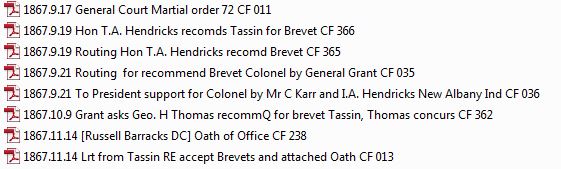
Step 6. Better names. Here is an example from a project I’m working on. I’ve applied a short title between the date and the letter coding to identify the document.
Notice I’m retaining the letter coding and original document order. This helps me see what these documents are about without opening them individually.
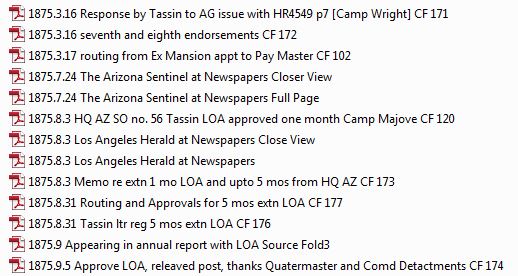
Step 7. Timeline Power! So, I have all these individual folders with different types of documents in each folder…CF, PF, CW. They are all in date order but still in their original folders. What if I could see them all together? What a story they would tell! Let’s do that. So the process is this. Create a new folder. Copy and Paste the CF, PF, and CW contents into the new folder. Retain all documents in their original folders! This is a Copy, not a Move. What would that look like?
So, for the project I’m working on, I have been collecting, scanning as necessary, renaming by date order, and dropping copies into one BIG Master Folder. This is the story of his life!
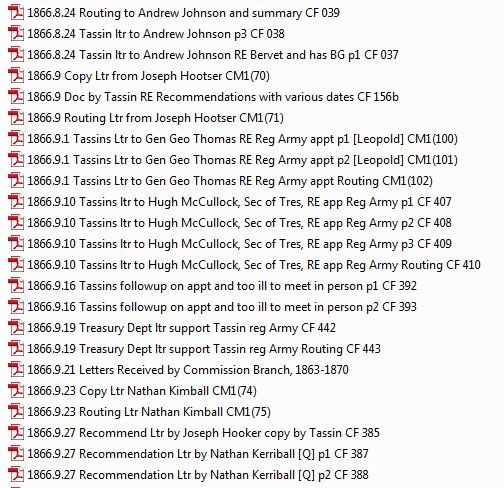
Here, we can see different types of documents collected from various sources. Each is in chronological order. I like seeing press accounts mixed in with NARA documents and those lined up with the regular vital records, census documents, etc.
So, in closing, just a little bit of extra work done upfront adds value to the result. Can you see how easy this grouping method would make story writing?
Modify this process to your application. You might, for instance, prefer to keep separate folders for each of the various original source documents, not mixing one with another. That’s fine; just be able to recall, access, and apply the data.